
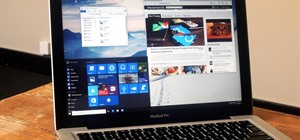
Is your Mac starting to feel messy and sluggish after using iOS 8 on your iPhone every day? Even with all of the iOS-friendly features built in to Mac OS X Yosemite, your Mac can still feel kind of "old" in comparison to an iOS device—but it doesn't have to. Using the tips and tricks below, you can easily make your Mac desktop or laptop look and feel like iOS 8 in no time.
How to Make Your Mac "Look" Like iOS 8
First we'll get the aesthetics out of the way, then we'll move on to getting the iOS 8 feel in the following section.
Step 1: Use an iOS 8 Wallpaper
If you want your Mac to look like an iPhone, changing the wallpaper is the logical first step. There are many iOS 8 wallpapers for the iPhone, and thanks to developer Delphox, you can download all of their desktop-sized equivalents using the .zip file below.
After unzipping the file, you can save all of them in a folder on your desktop (or wherever), then go to System Preferences -> Desktop & Screen Saver -> Desktop to choose your background from the options that appear on the left. If you don't see your folder, you can click on the + sign to add it to the list.
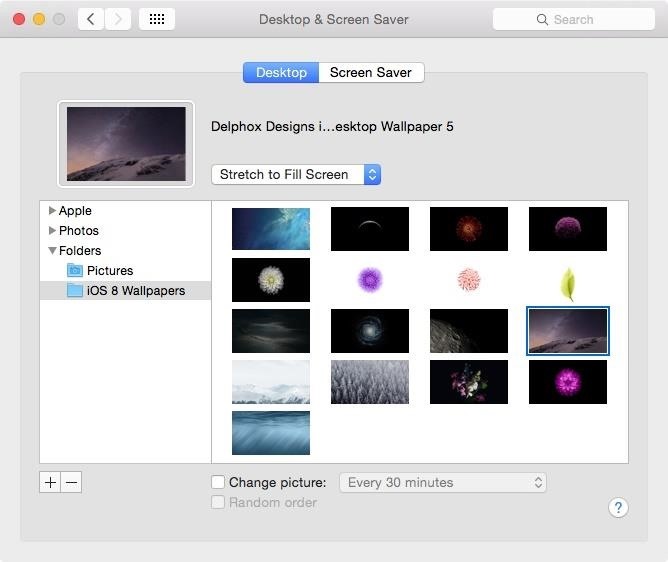
As for placement, I chose the "Stretch to Fill Screen" option (since my display is pretty big), but "Fit to Screen" should work for you if you've got a laptop or smaller display. If you see bars on the top and bottom of the image, you should probably use "Stretch to Fill Screen."
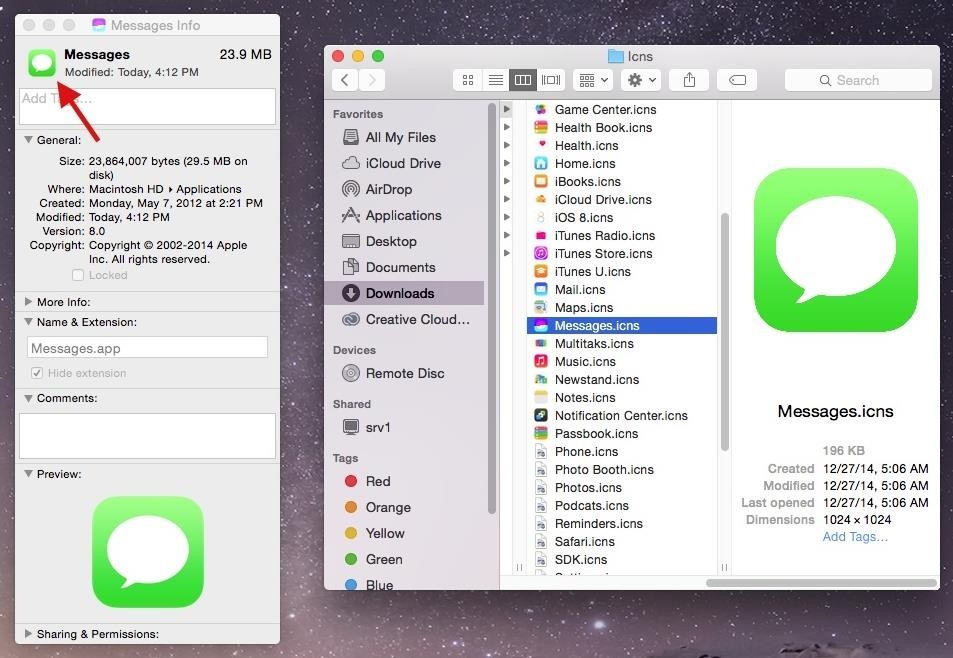
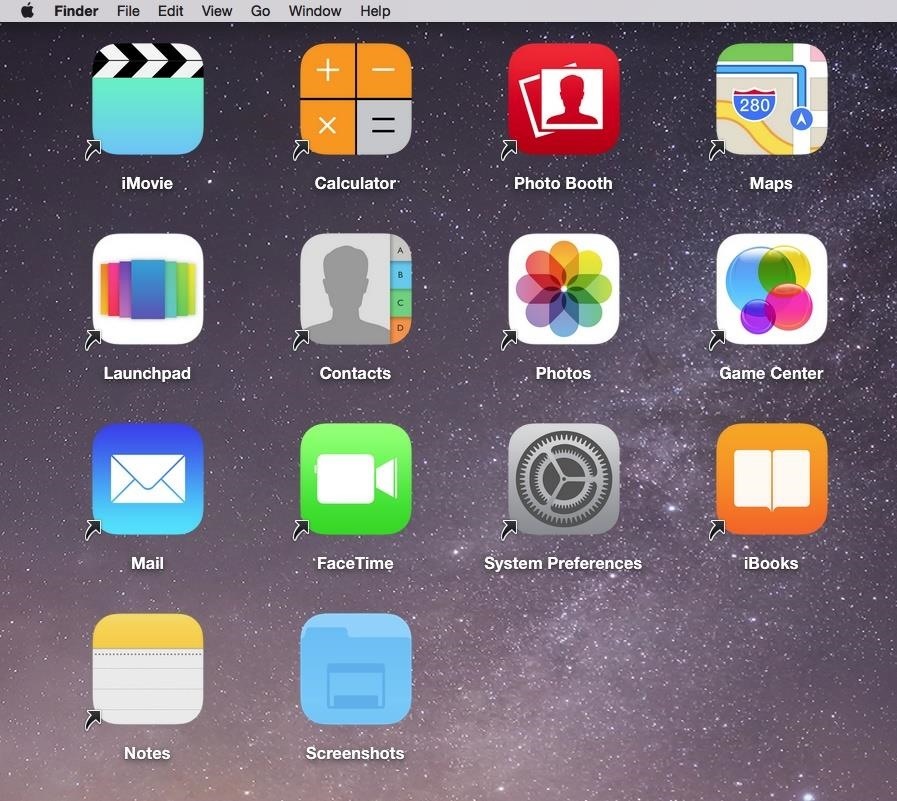
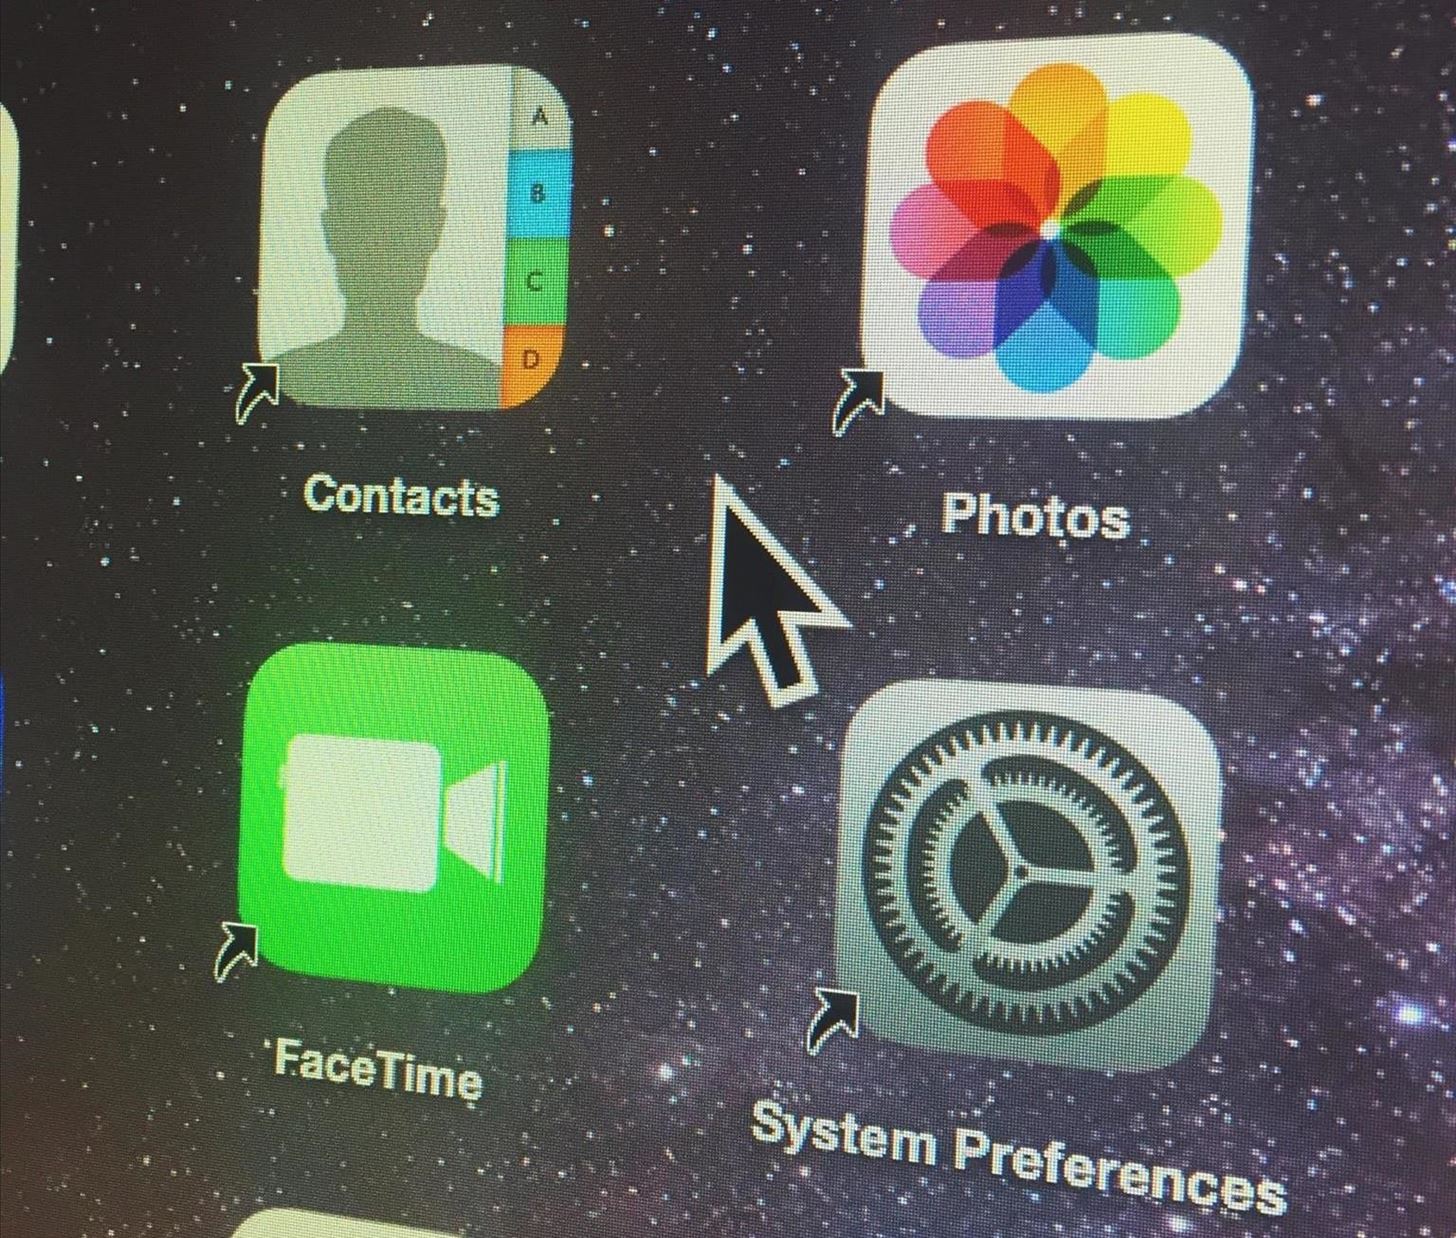
Step 2: Use iOS 8 App Icons
Dtafalonso created a set of iOS 8 icons that you can use to replace all of the app icons in Mac OS X. These versions are all square with round corners and flat colors, just like on iPads, iPhones, and iPod touches. Note that this icon pack is incomplete, so you won't find icons for every app, but he is working on two more packs, so keep an eye on his Google+ page.
- Download: iOS 8 icons pack for Mac (click on the "Download" button to the right of the image on DeviantArt)
Unzip the file, enter the "iOS 8 Icons" folder, then go to the "Icns" folder inside of that. There you will see the iOS 8-style icons for Mac applications such as Messages, Maps, iTunes, Photos, etc.

Replace existing app icons individually by going to Applications, right-clicking on an app, selecting Get Info, then dragging the new app icon over to the old app icon that appears at the top-left of the window.
New icons won't show up automatically, so you'll need to open the app and close it to make the new icon appear. Yes, you'll have to do this one by one, but it shouldn't take too long (~5 minutes for me). If you want to speed up the process and do them all at once, there's an app called LiteIcon that can do all the heavy lifting for you.
To revert back to your original Mac icons, simply click on the new app icon at the top left in Get Info, then hit Delete on your keyboard.
Step 3: Edit Desktop View Options
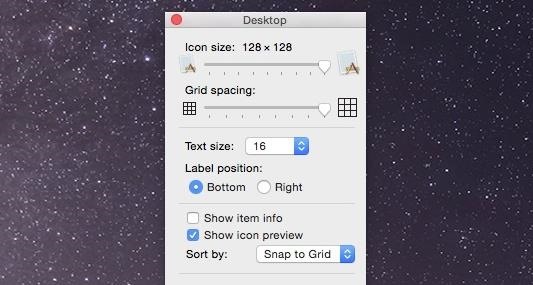
Now that you've made desktop and app icons in Mac OS X Yosemite look more like iOS 8, it's time to edit existing features and options. Start by managing what the desktop looks like by right-clicking on it to go to Show View Options.
Edit your desktop in this way:
- Icon size: 128 x 128
- Grid spacing: all the way to the right
- Text size: 16
- Label position: Bottom
- Show item info: Uncheck
- Show icon preview: Check
- Sort by: Snap to Grid
Step 4: Add Apps to Your Desktop
Now that the desktop view is all set, add some applications (preferably ones with icons you got from Dtafalonso's icon pack) to your desktop by dragging their app icon over on top your iOS 8 background. Then place all loose files into a folder and arrange all the icons in a neat manner.
Step 5: Increase Dock Size, Prevent App Bouncing, & More
With the desktop all set to go, it's time to get your dock looking more like iOS 8. Open the dock, then right-click on the divider and choose Dock Preferences from the list. On this page, do the following:
- Size: Large
- Magnification: Doesn't matter
- Position on screen: Bottom
- Minimize windows using: Genie effect
- Check the box next to Minimize windows into application icon and Show indicators for open applications
- Uncheck the other three options
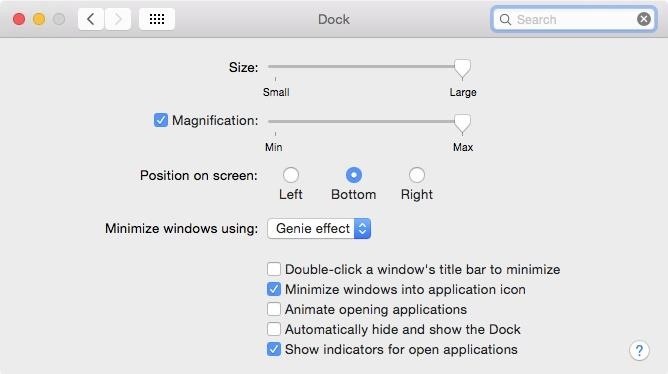
With these features, your app icons will no longer bounce when they open and your open windows will minimize into the app icon itself, giving the dock a cleaner look.
Step 6: Add Spaces to the Dock & Choose Apps
To make your dock look more aesthetically pleasing, use my previous guide on how to add blank spaces to your dock. Since there is no way to get rid of the Finder and Trash icons, I simply added two spaces on both ends of the dock, with four of my most used apps in the middle.
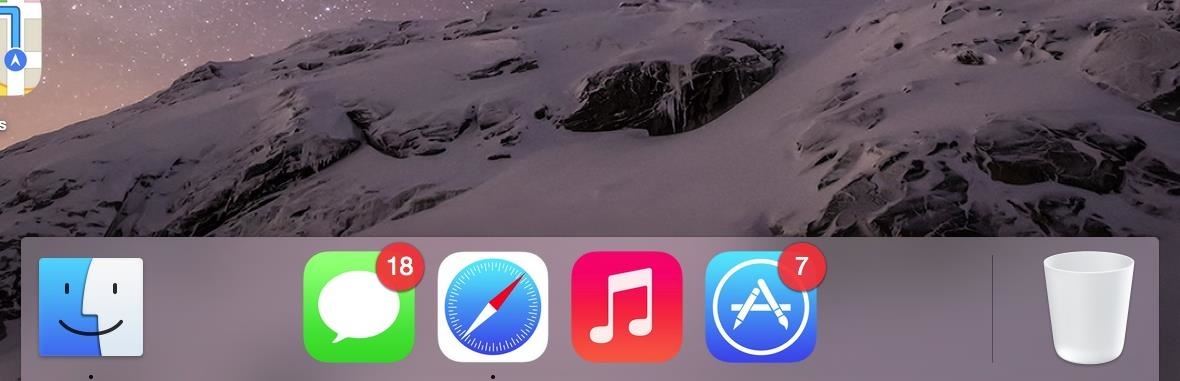
Obviously, feel free to add more apps and not use any spaces at all—it's all about preference and customization here—but I wanted my dock to be minimal, with the rest of my apps resting on the desktop instead.
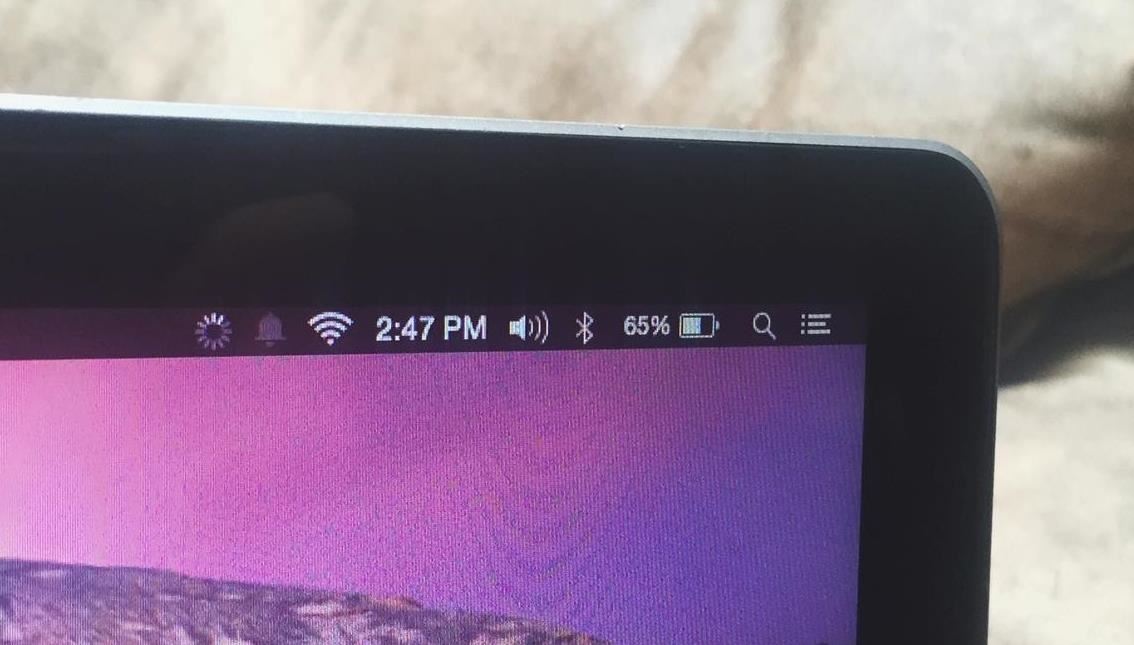
Step 7: Add More Icons to Menu Bar
While the left side of the menu bar isn't going to look much like the one on your iOS device, you can adjust the right side, where app icons and the date reside.
- System Preferences -> Bluetooth -> check the box next to "Show Bluetooth in menu bar"
- System Preferences -> Date & Time -> Clock-> make sure only digital time is showing (no date)
- System Preferences - > Energy Saver -> check the box next to "Show battery status in menu bar"
- Download and install Loading, which adds a iOS-like network activity icon to your Mac OS X menu bar (make sure to enable apps from unidentified developers)
Step 8: Increase Display Contrast & Cursor Size
This step involves increasing display contrast by going to System Preferences -> Accessibility -> Display, then placing the "Display contrast" cursor on the second hash mark. This will improve colors and make it appear more like the IPS display on an iPhone.
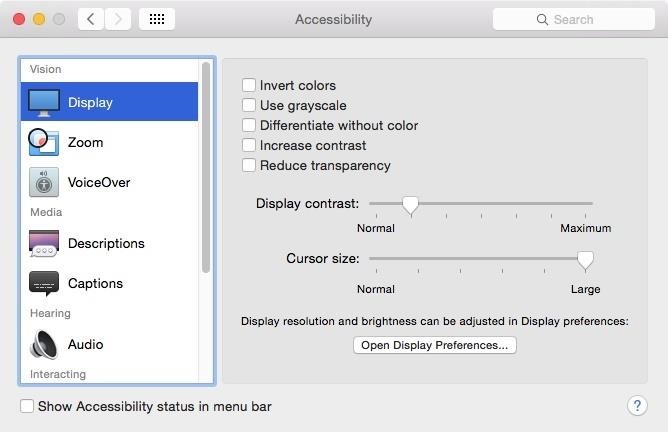
While this is purely optional, I made the cursor size the largest possible because I wanted it to be the equivalent of what a finger-press would look like on my iPhone.
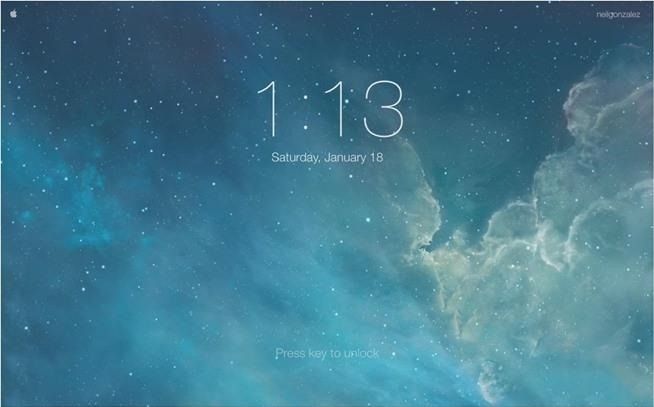
Step 9: Add a "Lock Screen" Screen Saver
While it's not officially a lock screen, you can mimic your iPhone's lock screen by adding an iOS-type screensaver to your Mac. Just follow Neil's guide, which provides the download links and everything you need to get the screensaver set up.
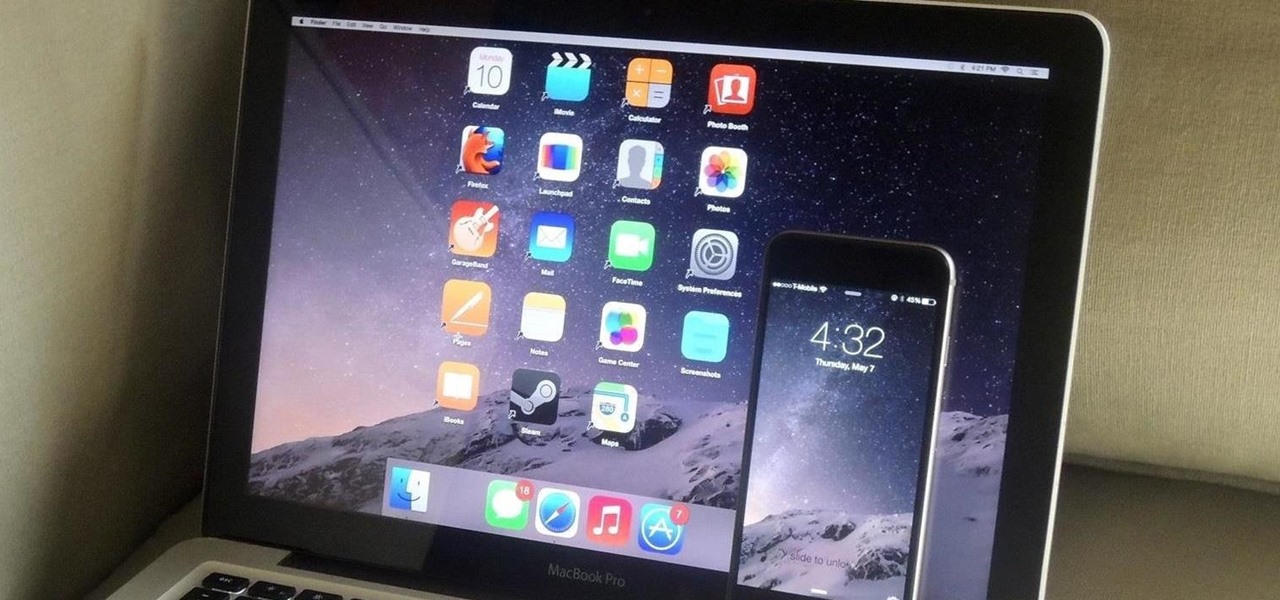
Final Result: Yosemite vs. iOS 8 Looks on a Mac
After all the changes, my desktop went from this:
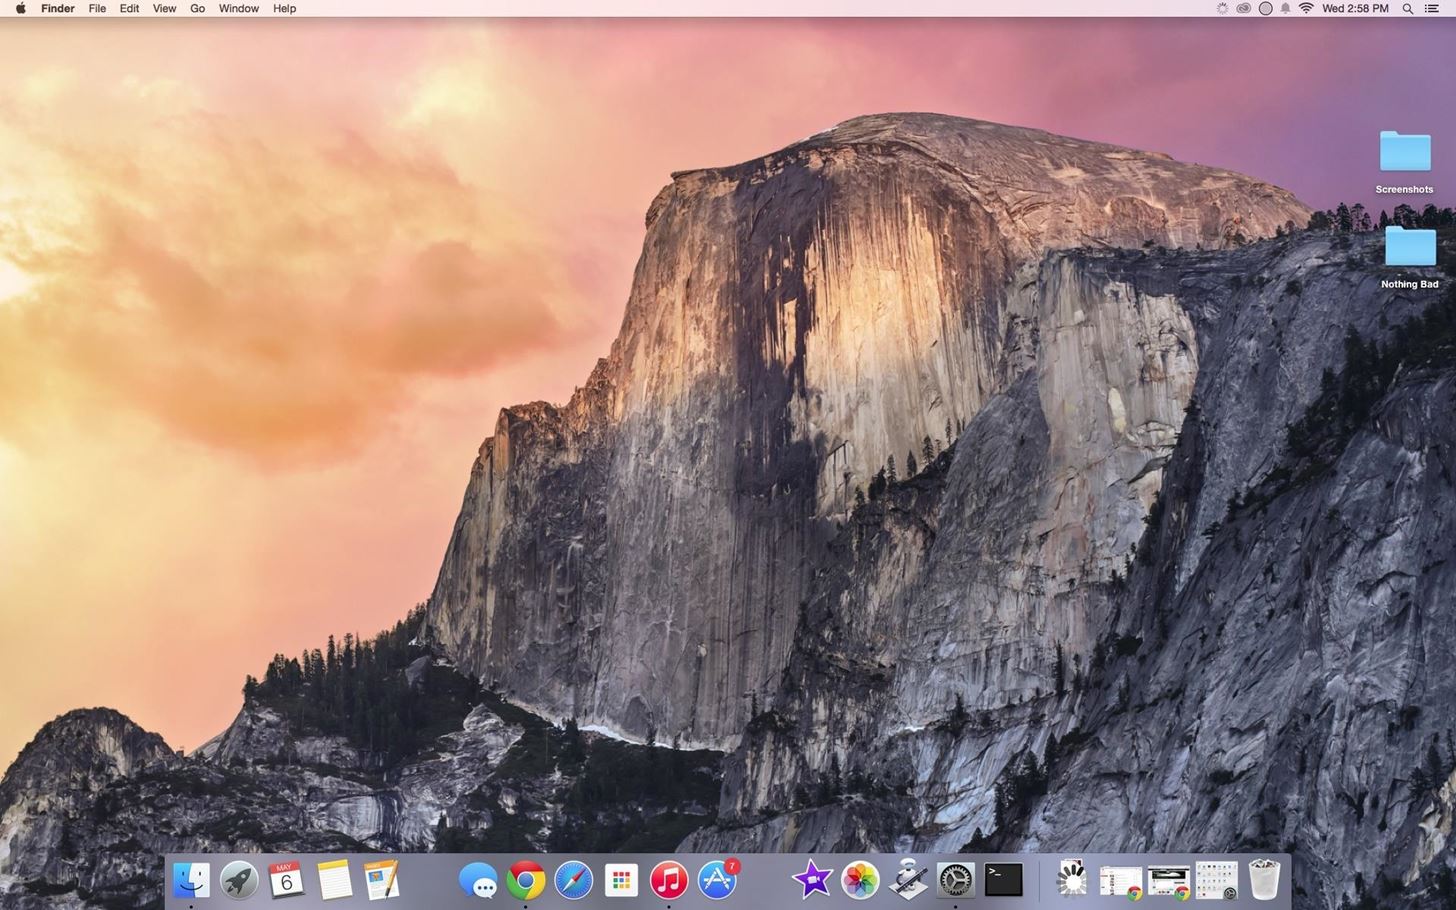
To this iOS 8-style look:
How to Make Your Mac "Feel" Like iOS 8
While the steps above make your Mac look more like your iPhone, they don't bring the features from your mobile device to your desktop. Check out the list below to see which features from iOS you can add to Mac OS X Yosemite.
- Install Siri
- Unlock with Touch ID
- Make Phone Calls
- Send SMS and Voice Messages
- Use Predictive Text
- Add Widgets to the Notification Center
- Add Control Center
Whether you use some or all of the above tweaks, your Mac should now look and feel like iOS 8 on an iPad, iPhone, or iPod touch. Share your completed desktop with us below, and definitely let us know if you have any more tips and tricks for getting that iOS look and feel.
Follow Apple Hacks on Facebook and Twitter, or Gadget Hacks over on Facebook, Google+, and Twitter, for more Apple news, apps, and tips.
Just updated your iPhone? You'll find new emoji, enhanced security, podcast transcripts, Apple Cash virtual numbers, and other useful features. There are even new additions hidden within Safari. Find out what's new and changed on your iPhone with the iOS 17.4 update.


Be the First to Comment
Share Your Thoughts