
As a regular Mac OS X user, I have a love/hate relationship with the "Open With" contextual menu. Sometimes, it has just what I need. Other times, it's often packed with unnecessary or duplicate items, or missing the app I want to open the file up with the most.
Unfortunately, the "Open With" right-click menu does not have its own preferences, so there is no one way to fix all of these issues. But with a little work and determination, you can finally get the "Open With" menu exactly how you want, for every filetype on your Mac.
How to Clean Up Duplicate Apps in "Open With"
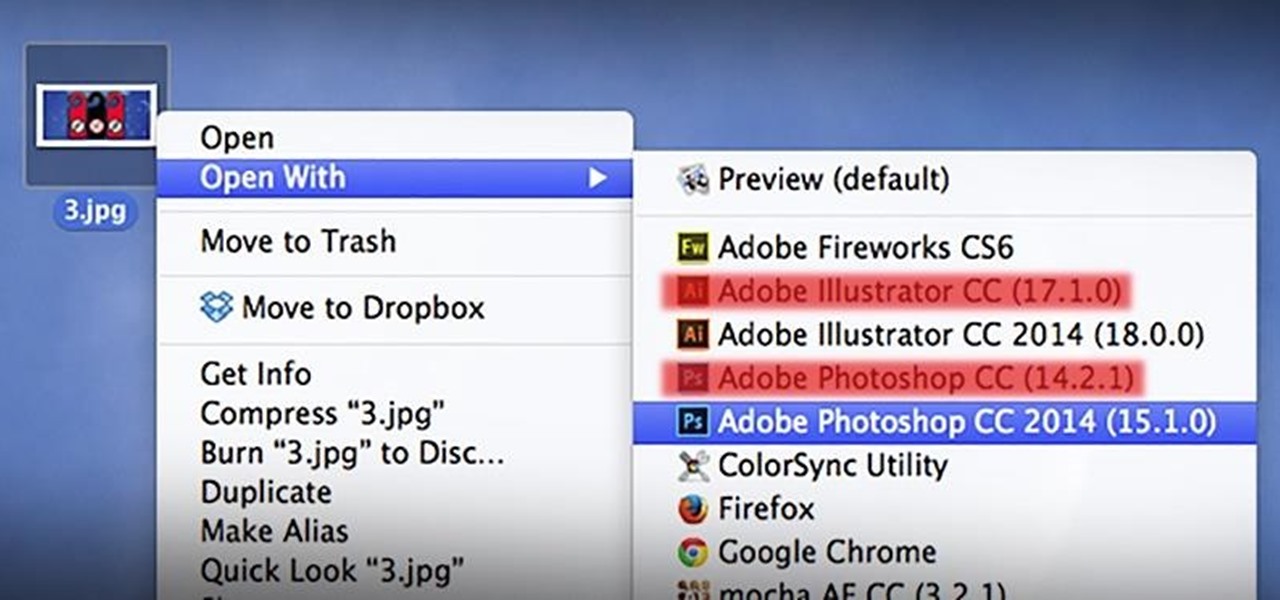
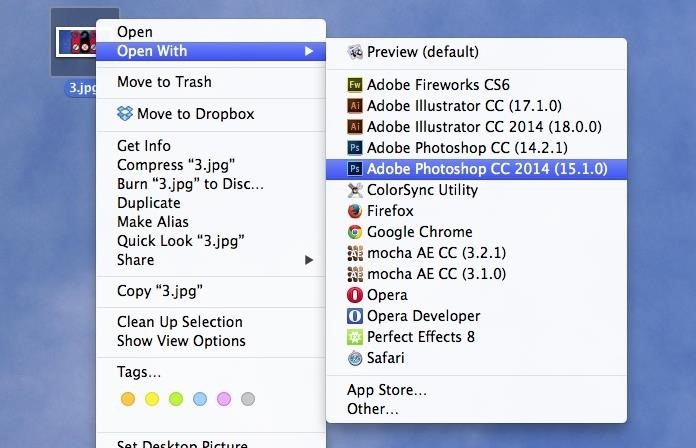
One of the biggest problems with the "Open With" menu is duplicate applications. If you're getting app updates from the Mac App Store, this usually will never happen, but if it's an app you installed from outside the Mac App Store, like Spotify or Photoshop, you'll sometimes see multiple instances of each app in the "Open With" options.
In order to get rid of duplicate apps, you'll need to rebuild the Launch Services database, which stores all of the "Open With" options. Below, you can check out three different methods for doing this. Depending on what you're comfortable with, you can either use Terminal commands, trash a .plist file, or use a third-party app.
Method #1: Use Terminal to Clear Duplicates
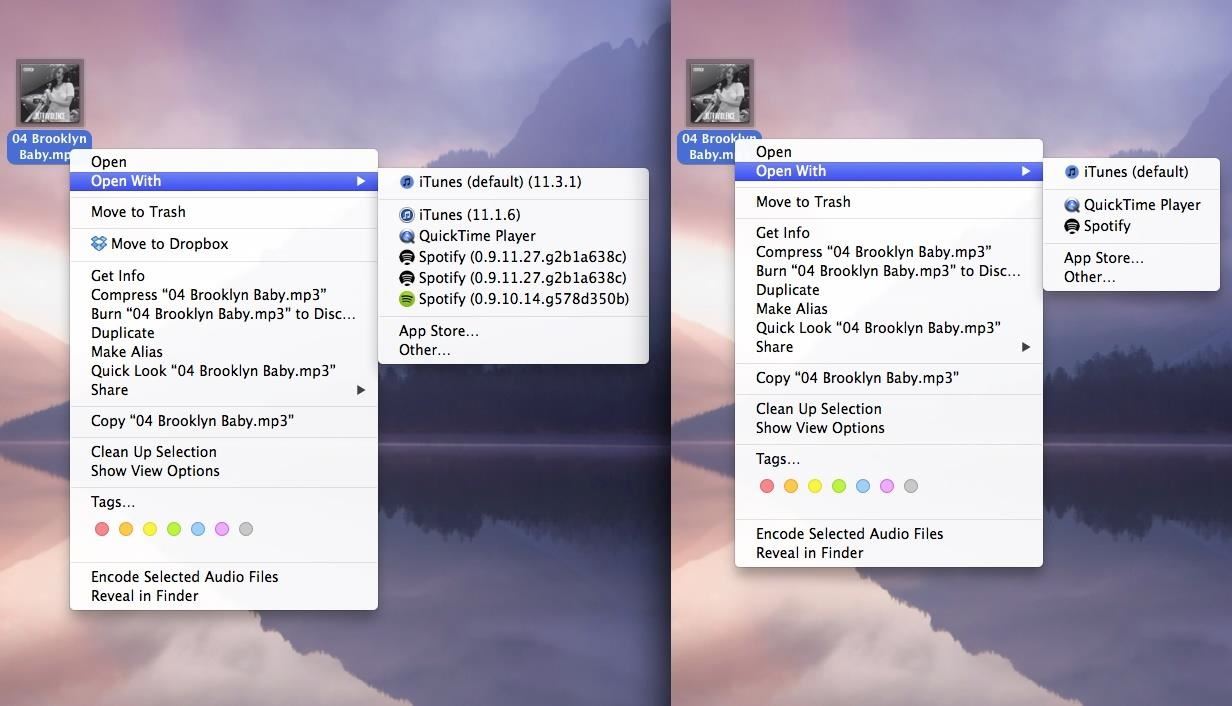
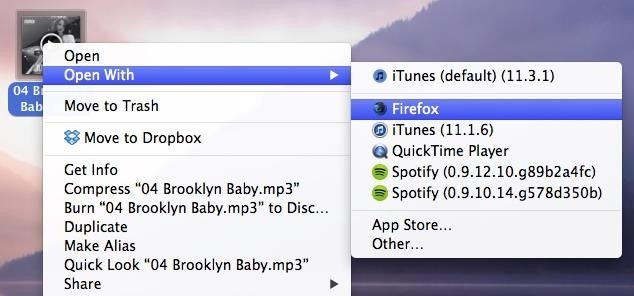
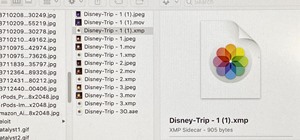
On my Mac, I currently have duplicate Spotify versions showing up whenever I try to open up an MP3 file. Below, you can see the before (with 3 versions of Spotify) and after (with only the latest Spotify version).
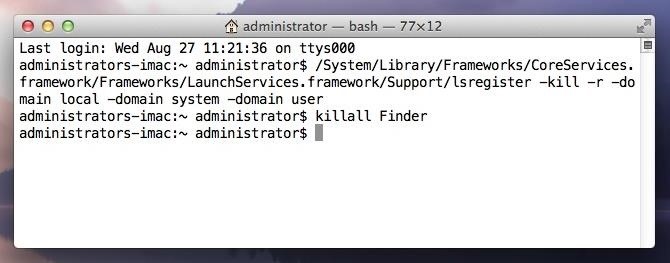
Open up Terminal and enter the following two commands, each followed by the Enter key. These commands will rebuild the LaunchServices file and will refresh the Finder so that the changes take effect. You might have to wait a minute or two for the first command before killing the Finder, as the database needs time to restructure itself.
/System/Library/Frameworks/CoreServices.framework/Frameworks/LaunchServices.framework/Support/lsregister -kill -r -domain local -domain system -domain user
killall Finder
All of the duplicates that previously appeared in "Open With" should now be gone. If you're not comfortable using Terminal, try out the next method.
Method #2: Manually Delete the LaunchServices File
One of the easiest ways to clear duplicate apps is by manually deleting the LaunchServices preference file. Doing so will cause Mac OS X to rebuilt it, choosing only the latest versions of each app.
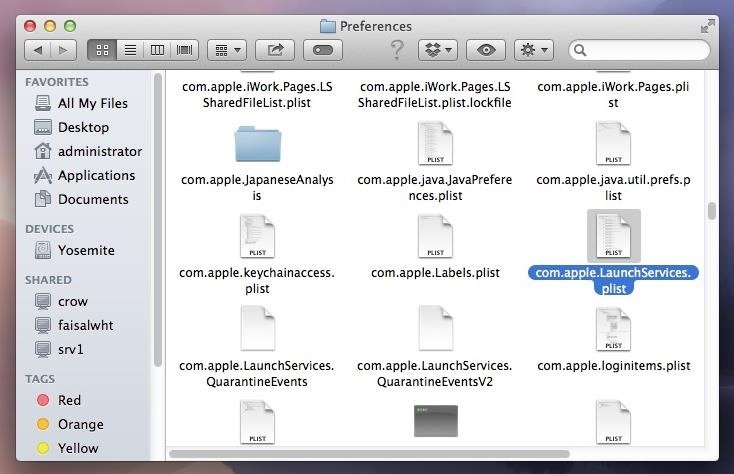
- With Finder open, hold down on the Option key on your keyboard while clicking on Go in the menu bar.
- Select Library.
- Open the Preferences folder.
- Find the com.apple.LaunchServices.plist file and trash it.
Afterward, make sure to close all applications before clearing your Trash, so that the .plist file can properly deleted. If it doesn't work right away, restart your computer for all of the changes to take effect.
Method #3: Use OnyX to Do It for You
Lastly, you can also use a third-party app in order to rebuild your LaunchServices .plist file.
- Download and install OnyX by Titanium Software. Make sure to choose the right version for your version of Mac OS X.
- Enter your admin username and password to install. You may need to go into the Security & Privacy settings in your System Preferences to allow the installation from outside of the Mac App Store.
- Open up OnyX and go to Maintenance -> Rebuild.
- Check the box next to LaunchServices.
- Click Execute.
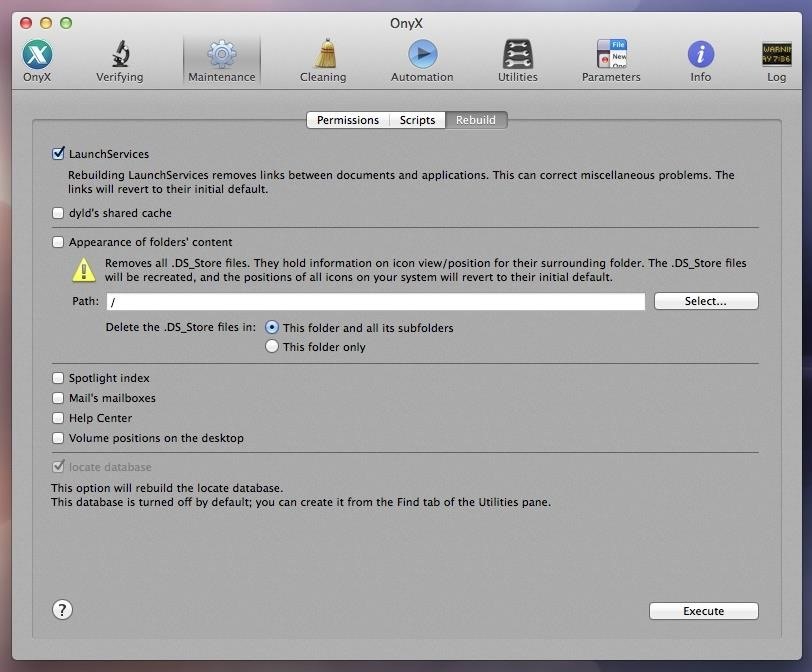
OnyX will then close all of your applications and rebuild your LaunchServices .plist file for you.
How to Delete a Specific App from "Open With"
While clearing the LaunchServices .plist will clear any duplicates, it won't get rid of an unwanted app that appears under the "Open With" menu. For this section of the guide, I will be deleting Firefox as an option for opening screenshots, which have a .png extension.
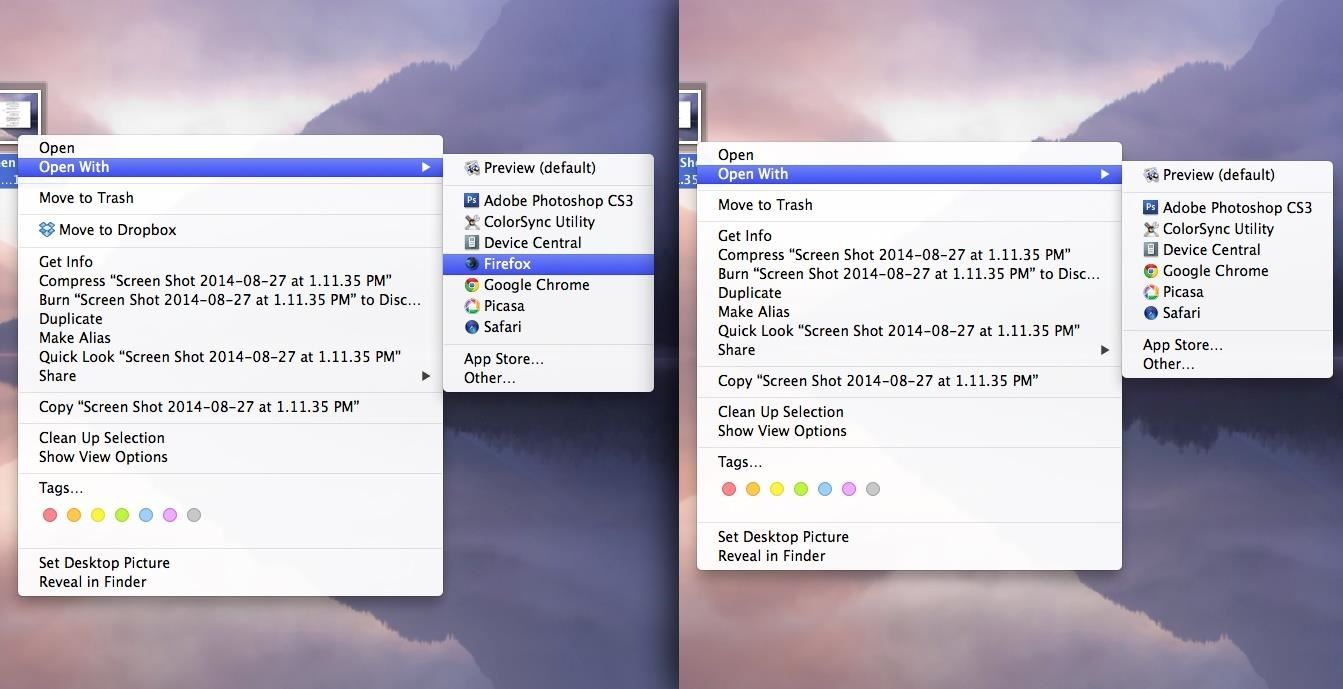
To ban a specific application from appearing under "Open With" for a certain file, do the following.
- Go to the app you want to ban and right-click on it.
- Click on Show Package Contents.
- Open the Contents folder.
- Open Info.plist with any text editor, like TextEdit.
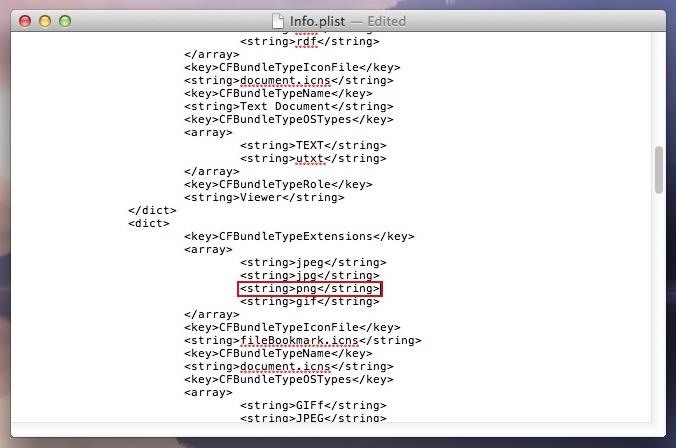
- Look for CFBundleTypeExtensions, which should show up several times. Under that, you should see a few lines that have <string>file name</string>.
- Once you find the suffix you want to take off (in my case. it's the <string>png</string> line), delete it from the text editor and save the file.
- Lastly, open Terminal and enter the killall Finder command.
Now when you select the "Open With" option, the app will be gone.
How to Add an App to "Open With"
Now that I've shown you how to get rid of an app, I'm going to show you how to add an app to the list for a certain file. I will be adding Firefox to the list of options that show up for .mp3 files.
Similar to the process above, you'll need to right-click on the app, select Show Package Contents, open the Contents folder, and open the Info.plist with a text editor. Then, between any two </dict> and <dict>, add the following:
<dict>
<key>CFBundleTypeExtensions</key>
<array>
<string>url</string>
</array>
</dict>

Save the file, then go to Terminal and enter the following two commands to save the changes.
/System/Library/Frameworks/CoreServices.framework/Versions/A/Frameworks/LaunchServices.framework/Versions/A/Support/lsregister -f /Applications/TextEdit.app/
killall Finder
Now when you open a certain file (.mp3), you'll see the application that you've added (Firefox) as an "Open With" option.
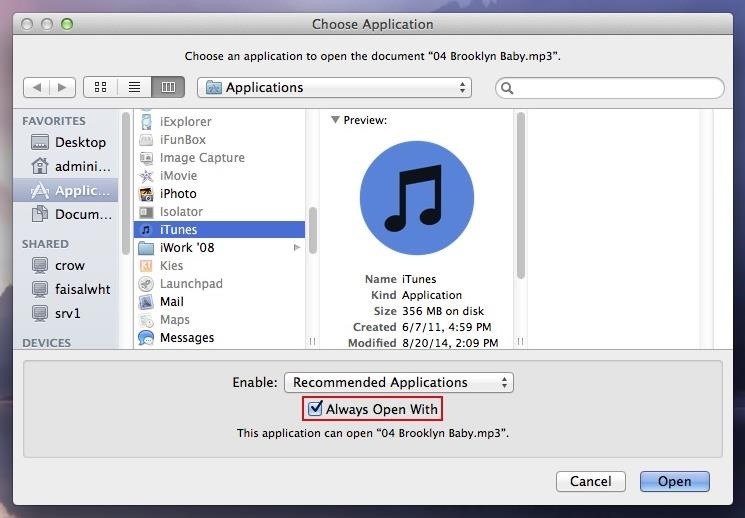
How to Set an App as the Default Option in "Open With"
Lastly, I'm going to show you how to set an app as the default "Open With" option for whenever you just want to double-click on a file and open it up directly.
- Right-click on the file.
- Select Open With.
- Click on Other....
- In the window, find the app you want to open the file with and check the box next to Always Open With at the bottom.
- Select Open.
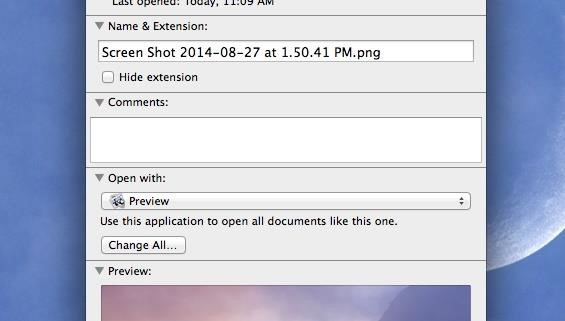
Alternatively, you can do this by right-clicking on the file and choosing Get Info (keyboard shortcut Command + I). Then just select the app you want as the default under the Open with: section, and click on Change All... to complete the action.
Now every time you open a file with a certain extension using a double-click, it will open with the default app.
If you guys have any other problems with the "Open With" contextual menu, let us know and we'll see what we can do.
Just updated your iPhone? You'll find new emoji, enhanced security, podcast transcripts, Apple Cash virtual numbers, and other useful features. There are even new additions hidden within Safari. Find out what's new and changed on your iPhone with the iOS 17.4 update.


9 Comments
Tried to add a Program to 'Open with' but it didn't work—ˆ was using TextWrangler, not TextEdit. Could that be an issue? Does it work in Yosemite?
tx
This does not work in Yosemite!
I have accidentally removed the whole <dict> part in order to delete a specific app from the open with menu. Now some apps do not just start, giving the error "quit unexpectedly". Do you somehow know how can i restore those info.plist files?
This also does not work for me. I'm running Yosemite and edited the info.plist of the Sublime Text 2 app with
<dict>
<key>CFBundleTypeExtensions</key>
<array>
<string>plist</string>
</array>
</dict>
in between two other <dict> </dict>s. Then executed the following commands in the terminal:
/System/Library/Frameworks/CoreServices.framework/Versions/A/Frameworks/LaunchServices.framework/Versions/A/Support/lsregister -f /Applications/Sublime Text 2.app/
killall Finder
No dice for Sublime Text in the "Open With" menu for .plist files.
Also, you may want to write <string>jpg</string> in your example above rather than <string>url</string> because the former is the way it is written in your firefox .plist file
It worked thanks!
(Method #1: Use Terminal to Clear Duplicates)
This worked in El Capitan but I had to make sure I didn't change my directory while in Terminal. If I just copy/paste the first command it works properly. Followed by the second one.
I then used the method of adding a program to the list.
Fantastic Thanks! Had out-of-date MacVim very sad what a hero!! :):)
I am using 10.14 Mojave and Adobe Creative Cloud and have a weird occurrence. Illustrator CC 2019 is set as default open with which can be viewed in the info panel and if you click on an ai file it will auto open in Illustrator but if you use open with menu it shows Preview as (default). Adobe Illustrator is in the Lust of applications it can open with but not the default. Nothing has worked to change Preview from showing as default. In my experience when a native app such as Illustrator was installed it overrides Preview as a default in the open with list. I have tried everything even wiped and reinstalled op system but still does the same thing. It is not a huge issue as clicking files opens in the correct application but it is annoying to see Preview as coming up as the default in the Open With menu list.
Tried with Mojave 10.14.5 to add iPhoto to JPEG 'Open With' and it did not work for me. I even went into another program that was on the 'open with' list and copied that <dict> text list for JPEG, but again to no avail. Any word on whether this works for Mojave?
Share Your Thoughts